Note: Some of the options available to you, as well as the look of the Schedules interface, may change depending on the system type. Additionally, schedules can only be applied to systems of the same series.
Dealer Admin helps you configure and manage schedules on your customers’ systems. In this section, you’ll learn how to add, edit, and delete a schedule. You’ll also learn how to configure area settings.
Refer to the following information:
Add a Schedule
Prerequisites
-
Schedule Management is enabled in System Information.
-
For areas to be included in Arming (permanent) schedules, Automatic Arming and Automatic Disarming are enabled for areas in Programming > Area Information.
-
To create output schedules, an output is first programmed in Programming > Output Information.
-
To create favorite schedules, a favorite is programmed in Virtual Keypad.
-
To create door lock/unlock schedules, doors are enabled in System Information, programmed in Programming > Device Setup, and added to System Information > Door Control. For complete instructions, refer to .
-
If you want to use Sunrise and Sunset times, a Weather Zip Code is programmed in Programming > System Options.
XR150/XR550 and XT75 Control Panels
To add a schedule to XR150/XR550 and XT75 systems, complete the following steps:
-
Log in to Dealer Admin (dealer.securecomwireless.com).
-
Go to Customers and select the System Name.
-
In the left menu, go to Schedules.
-
Select the

Note: Select the Temporary Schedule checkbox if you want to create a temporary schedule. Enter a Start Date and End Date for when the schedule begins and expires.
-
Enter a Schedule Name and Schedule Number.
-
In Times, enter the begin and end times for the schedule in the appropriate day slots in 24-hour or 12-hour format. For 12-hour format, enter the time with AM or PM.
-
To set specific times for holiday schedules, enter them in the holiday slots (Hol A, Hol B, or
Hol C).
Note: Holiday schedules can only be created from VirtualKeypad.com or the panel User Menu. To create a holiday schedule, finish configuration in Dealer Admin, then Log In as a Customer.
-
If needed, select the Apply Times to All Areas checkbox to apply the schedule times to areas.
-
In Copy to Systems, choose Times, Areas, Doors, Outputs, and Favorites for the schedule if needed.
-
Select the systems you want to be affected by the schedule.
-
At the top of the screen, elect Send Changes to System.
XT30/XT50 Control Panels
To add a schedule to XT30/XT50 systems, complete the following steps:
Create an Arming (Permanent) Schedule
Example: Program the system to disarm automatically at 8:00 AM and arm at 5:30 PM Monday – Thursday.
You can create one arming schedule per XT30/XT50 system. To create a permanent schedule for an XT30/XT50 panel, complete the following steps:
-
Log in to Dealer Admin (dealer.securecomwireless.com).
-
Go to Customers and select the System Name.
-
In the left menu, go to Schedules.
-
In the row of the Arming Schedule, select the

-
In Times, enter the days and times for the system to automatically Disarm and Arm.
-
In Closing Check, select the checkbox if you want the keypad to annunciate a reminder when the system is not armed at the schedules time.
-
In Automatic Arming, select the areas that you want to be automatically armed in one hour if the system is disarmed before the Disarm time.
-
In Apply to Systems, select the schedule types to send to the system.
-
At the top of the screen, select Send Changes to System.

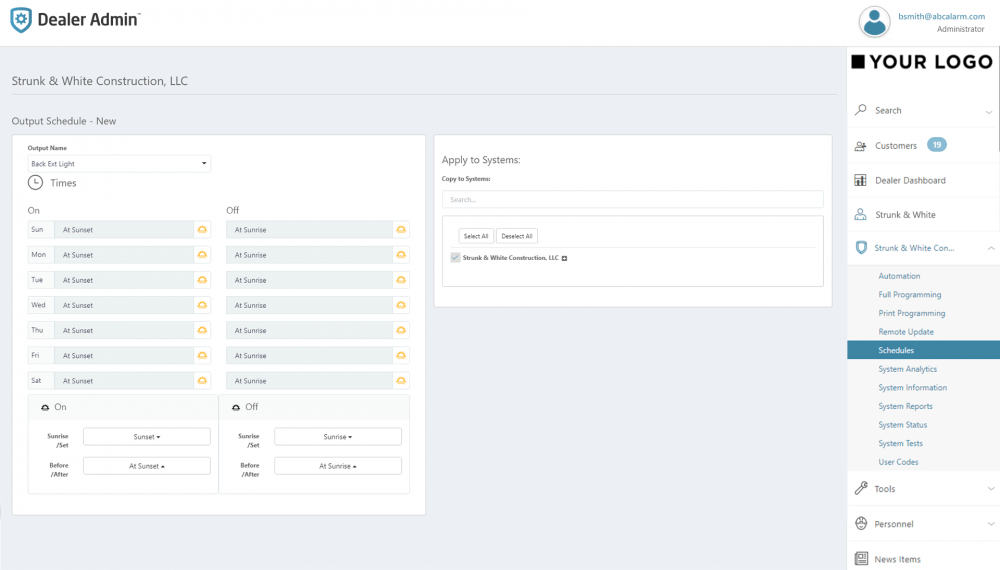
Create an Output or Favorite Schedule
Example: Program a schedule so a light turns on automatically at sunset and off at sunrise.
You can create up to 4 output schedules and 20 favorite schedules per XT30/XT50 system. To create an output or favorite schedule for an XT30/XT50 Panel, complete the following steps:
-
Log in to Dealer Admin (dealer.securecomwireless.com).
-
Go to Customers and select the System Name.
-
In the left menu, go to Schedules.
-
Select + Add Schedule, then select the type of schedule that you want to create.
-
In Output Name, select the output that you want to turn on, turn off, or activate with the schedule.
-
In Times, enter days and times for the output to turn on or off.
-
In Copy to Systems, select the schedule types to send to the system.
-
Select systems to be affected by the schedule.
-
At the top of the screen, select Send Changes to System.
Edit a Schedule
To edit a system schedule, complete the following steps:
-
Log in to Dealer Admin (dealer.securecomwireless.com).
-
Go to Customers and select the System Name.
-
In the left menu, go to Schedules.
-
In the row of the schedule that you want to edit, select the
-
Edit the schedule’s information and additional options as needed.
-
Select systems to be affected by the schedule.
-
At the top of the screen, select Send Changes to System.
Delete a Schedule
Note: You can only delete schedules for XTL Series and XR150/XR550 systems on Dealer Admin.
To delete a system schedule, complete the following steps:
-
Log in to Dealer Admin (dealer.securecomwireless.com).
-
Go to Customers and select the System Name.
-
In the left menu, go to Schedules.
-
In the row of the schedule that you want to delete, select the

-
A dialog box pops up to confirm your decision. To delete the schedule, select Confirm.