Dealer Admin helps you install and manage your customers’ systems. In this section, you’ll learn how to add, edit, and delete a system. For information about programming systems, refer to Programming.
For more information, refer to the appropriate installation and programming guides from DMP.com/resources.
To add a new system to a customer, complete the following steps.
Prefer a Video?
In this clip, we’ll show you how to add a system.
Step 1: Program Your App Key
The App Key is a dealer specific code that allows Dealer Admin and Virtual Keypad to connect to a panel. Before adding a system in Dealer Admin, complete the following steps to program your App Key into the panel:
Note: If you are using the panel’s default App Key, skip to Step 2: Set Up the System.
-
Go to Dealer Admin (dealer.securecomwireless.com).
-
To view your App Key, go to Settings > Dealer. Ensure the App Key matches what is in the panel and what is listed in Dealer Admin. For more information about App Keys, refer to The App Key on Dealer Admin.
Step 2: Set Up the System
The options available to you during system setup depends on the device and connection type. Before you can program or remotely update a panel, add the system and connect to the panel from Dealer Admin.
Note: EASYconnect only works on panels that are capable of wireless or wired network communication. For EASYconnect or network connections, ensure ALLOW NETWORK REMOTE is set to YES in the panel’s REMOTE OPTIONS at the keypad. For EASYconnect, ensure network outbound port 4001 is open.
-
Go to Dealer Admin (dealer.securecomwireless.com).
-
Go to Customers.
-
Select a customer to open the Customer Summary.
-
In Systems, select the

-
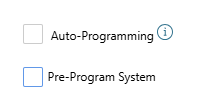
Select the Auto-Programming checkbox if you want the system to be automatically programmed once it comes online. Refer to Auto-Program a System for more information.
-
Select the Pre-Program System checkbox if you want to prepare the system programming in advance and manually send it to the panel once it comes online.
-
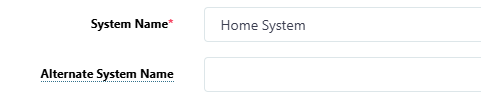
Enter the System Name, then enter an Alternate System Name if necessary and if the customer has not already created one.
-
Select the panel model in System Type drop-down menu.
-
In the drop-down menu, select a Connection Type:
-
Cellular: Enter the Account Number, then enter the SIM Number. Select Get Status. If the module is inactive, select Activate. Once activated, the Cellular Phone Number automatically populates in the field.
-
EASYconnect
-
EASYconnect + Cell Backup: Enter the Account Number, then enter the SIM Number. Select Get Status. If the module is inactive, select Activate. Once activated, the Cellular Phone Number automatically populates in the field.
-
Network: Enter the Account Number, then enter the panel network’s public IP address or DDNS hostname in Network Address.
-
For more information about connections types, refer to Connection Types.
Note: To enable DualSIM, choose Cellular or Easyconnect + Cell Backup as the Connection Type, then select the checkbox next to Use DualSIM. Enter the First Serial Number and the Second Serial Number, then select Get Status for each SIM number. If the module is inactive, select Activate next to each SIM number.
-
Enter the panel Serial Number.
-
If you’ve programmed a remote key in the panel’s REMOTE OPTIONS menu, enter it in Remote Key.
-
If needed, enter a Reference #.
-
At Tags, if needed add an existing tag or create a new tag for the system.
-
Select Save or refer to the steps below to enter the Install Information.
Install Information (Optional)
-
At Installation Type, select Commercial or Residential.
-
Enter the Installation Date.
-
Select the Primary Installer.
-
Select Sales Person.
-
Select Save or refer to the steps below to test the panel’s connection.
Test System Connection
-
To establish connection, select Test Connection at the top of the screen, then select Yes to start the test.
-
If the connection fails, troubleshoot connection type settings in Dealer Admin, panel COMMUNICATION and REMOTE OPTIONS programming, and physical configurations.
-
Select Save or refer to the steps below to configure Virtual Keypad options.
Step 3: Configure Virtual Keypad Options
Configuring Virtual Keypad options determines how your users interact with their systems in the app. Dealer Admin allows you to choose a system package, then enable or disable any of the options as needed.
-
At Virtual Keypad (App & Website) choose one of the following system packages:
-
Arming
-
Standard
-
Virtual Keypad Access
-
%20plans.png?cb=d933edd96fbbd1947f35f7702df29955)
-
In Additional Features, select any features that you want to activate.
-
If necessary, add tracked outputs, sensors, and doors.
-
For access systems, choose any doors that you want to include in the app.
-
In Video, choose any options that you want to include.
-
Continue to the next section to configure other features. Otherwise, select Save.
Step 4: Configure Other Features
Select any other features from Additional Options, Virtual Keypad Access, and Video that you want to include in the system, then select Save.