A customer must exist before you can add a system to their account. To learn about creating customers, refer to Add a Customer.
-
Go to Customers.
-
Select the customer’s name.
-
In Systems, select the Add icon.
-
Enter a name for the system.
-
In System Type, select X1.
-
Configure billing address and time options as needed.
-
Enter the door controller’s serial number.
-
Select Save.
Configure an X1 Door Controller
Note: OSDP readers must be either new or factory reset so they can bind properly with the system. A unique OSDP secure key is automatically programmed.
If door options don’t open automatically, select the X1 that you want to configure.
-
Enter a descriptive name for the door.
-
In Strike Time, enter the number of seconds that you want the door to unlock when access is granted.
-
In Strike Delay, enter the number of minutes that you want to delay the door unlock when access is granted.
-
In Reader Protocol, choose a protocol for this door’s readers: Wiegand or OSDP. For OSDP readers, configure buzzer and LED options.
-
In Authorization, choose which authorization type can be used to access any of the doors.
-
Turn on other options as needed. For details about each option, refer to Available Door Options.
-
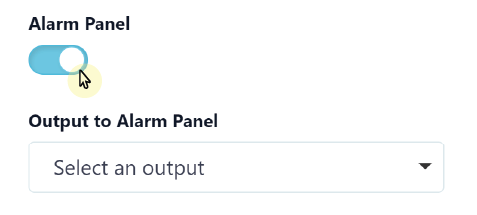
When setting up the controller to be associated with an alarm panel, toggle on Alarm Panel. This displays a drop-down menu to select an available output.
Note: The Alarm Panel option can only be used with a network connected X1 Door Controller.
-
The selected output will be wired to an available zone on the connected alarm panel. The zone must be programmed as an Arming or Keyswitch zone type. Wire an available output from the connected alarm panel to the Custom input of the X1 controller. The output of the connected alarm panel should be programmed as an armed output.

-
Select Save.
Available Door Options
-
Buzzer (OSDP) allows the reader to beep when a card is read.
-
LED (OSDP) allows the reader LED to turn on and operate the same as a Wiegand reader LED, lighting green when the module relay activates. If disabled, the reader LED is turned off and does not operate in any condition.
-
Card (Authorization) enables the use of cards for any of the doors.
-
Fire Zone indicates this custom output triggers with a fire alarm.
-
Fire Exit allows the door to unlock during a fire so people can exit the area.
-
Include in Lockdown allow this door to be included when a lockdown is initiated.
-
Door Sensor allows a motion detector mounted near the door to trigger a request to exit.
-
In Prop Time, enter the number of seconds that you want to allow the door to remain open without triggering an alert.
-
Door Forced Message sends a status message any time a door is forced open.
-
Request to Exit (REX) requires people to request exit. REX is usually triggered by motion near the door or a button press.
-
Unlock on REX appears when the Request To Exit toggle is switched on. Default is switched on. To allow the door to unlock when a Request to Exit input is received, enable the toggle. This is typically for magnetic locks. To allow the door to remain locked when a Request to Exit input is received, disable the toggle. This is typically for door strikes.