Note: Dealer Admin has tooltips that can help you determine what each programming option means. Hover over text with a blue underline to view tooltips.
Programming allows you to configure more settings during system installation than fast programming. For more information about programming categories, refer to Programming Categories. To program your system, complete the following steps:
-
Log in to Dealer Admin (dealer.securecomwireless.com).
-
Go to Customers and select the System Name.
-
In the left menu, go to Programming.
-
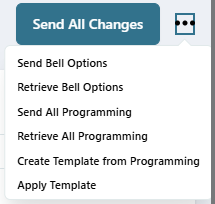
To retrieve programming from a panel or apply a template, select the

-
Send [Programming Category]: Only sends programming changes for a specific programming category to the panel.
-
Retrieve [Programming Category]: Only retrieves programming changes for a specific programming category from the panel.
-
Send All Programming: Overwrites all panel programming with Dealer Admin programming.
-
Create Template from Programming:
-
Retrieve All Programming: Overwrites all Dealer Admin programming with panel programming.
-
Create Template from Programming: Saves the programming for future applications.
-
Apply Template: Applies saved templates of programming settings.
-
-
Once completed, a notification displays the programming status. Refer to the information below for more details about programming statuses.
Programming Statuses
Programming statuses provide real-time updates on programming changes, indicating whether there are unsent changes and if the panel has retrieved any changes. The following statuses appear in Dealer Admin programming:
-
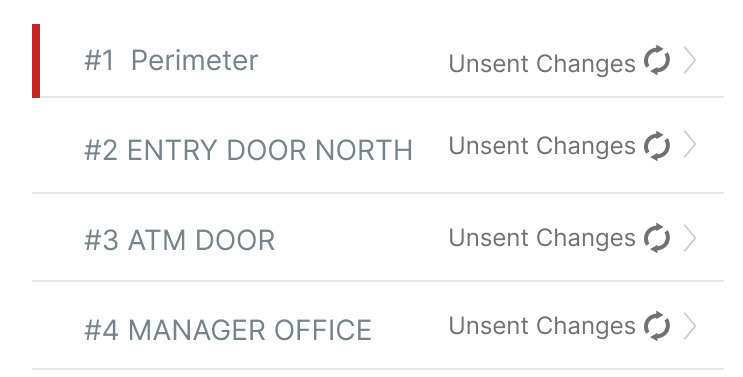
Unsent Changes — Programming changes have not been sent to the panel.
This status displays at the top of the screen next to the programming option, in the side menu, and next to each individual programming change within the selected programming option.

-
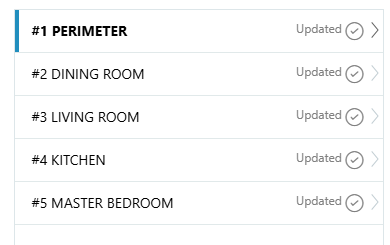
Updated — Programming changes have been sent and updated in the panel.
This status displays at the top of the screen next to the programming option and next to each individual programming change within the selected programming option.

-
Error Sending — Programming changes were sent to the panel but the panel did not receive and acknowledge the update.
An alert appears, providing details about the specific changes that failed to send to the panel, such as certain areas or zones.

To try to resend changes, select the ![]()
-
Send [Programming Category]
-
Retrieve [Programming Category]
-
Send All Programming
-
Retrieve All Programming
Programming Status Notifications
You can continue making programming changes while previous changes are still being processed. Each notification is specific to its corresponding change. The following notifications display at the bottom of the screen in Dealer Admin:
-
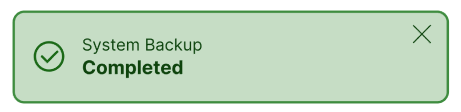
Completed — The programming change is complete and retrieved by the panel. The notification automatically disappears after 10 seconds.
-
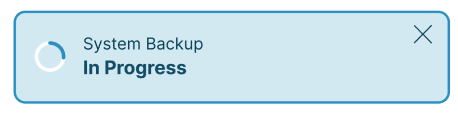
In Progress — The programming change is in the process of being updated. The notification remains on the screen until it is manually dismissed or the pending action is updated with a Completed or Error notification.
-
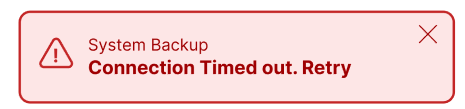
Error — There was an error in updating the programming change. The specific problem is detailed in the alert. The notification remains on the screen until manually dismissed.
Programming Categories
The following section contains descriptions of each category in the left menu in Programming. For more detailed information, reference the appropriate DMP guides. When programming devices, zones, or outputs, refer to the the device’s installation and programming guide.
Note: Entering duplicate serial numbers is valid when programming both internal and external contacts. If a duplicate serial number is entered, a notification appears to inform you that the serial number already exists. You can choose to proceed or make corrections as needed.
-
Communication: Choose how the system communicates and modify communication settings. Additionally, you can modify receiver settings. For XR150/XR550 systems, the number of available communication paths is displayed at the bottom of the Communication section.
-
Network Options: Program the system’s network connection settings, such as the local IP address, gateway, and ports. Edit the DNS Field here if DHCP is enabled.
-
Messaging Setup: Enable messaging for the system. This feature is not supported for panels with Version 202 or higher firmware.
-
Device Setup: The number of devices that you can add depends on panel type and the number of feature keys you have enabled. Select Add Device and enter or scan the device’s information. You can also delete existing devices. For XR150/XR550 panels and XT75 Control Panels, you can program access control devices. The number of available devices to program displays at the bottom of the Device Setup section.
-
Remote Options: Modify how the system interacts with the Virtual Keypad App, Remote Link, and Entré.
-
System Reports: Determine which reports the system will generate. Additionally, you can enter the Late to Open and Early to Close times.
-
System Options: Modify various settings for a system, such as the system arming type, entry and exit delays, bypass settings, time settings, and more.
-
Bell Options: Modify the system’s bell settings and enable automatic bell tests.
-
Output Information: Add outputs to the system depending on system type. You can also delete existing outputs.
-
Output Options: Enter the system’s outputs, as well as other information for the system’s outputs.
-
Output Groups: Assign outputs to groups. Output groups can be assigned to output options or alarm actions like single outputs, allowing an entire group of outputs to turn on and off as required.
-
Area Information: Add or delete areas. The type and number of areas you can add are dependent on the arming type of the system. Select an area’s name to edit that area’s settings.
-
Zone Information: Add or delete zones. The number of zones that can be added depends on the system’s capabilities. Select a zone’s name to edit its Wireless, Advanced, and Actions settings.
Note: Zones can be filtered using the following options: Zone Type, Area, and Wireless (Enabled or Disabled). Zones can also be filtered numerically or alphabetically.
-
Key Fobs: Add or delete key fobs.
-
Feature Keys: View and activate feature keys for XR550 Control Panels.
-
Lockout Code: Program a lockout code which limits the ability to program the system locally.