Refer to the following instructions for more information:
Reconnect the Doorbell to Wi-Fi
Note: Ensure that you know the Wi-Fi network and password that you wish to connect the doorbell to and that the network provides a 2.4 GHz or 5.0 GHz Wi-Fi signal.
If your Wi-Fi network name and password has changed, you can update the Wi-Fi information for your video doorbell on Dealer Admin.
If the doorbell is already mounted, complete the following steps to remove the doorbell from the backplate. If the doorbell is not mounted, skip to Step 3.
-
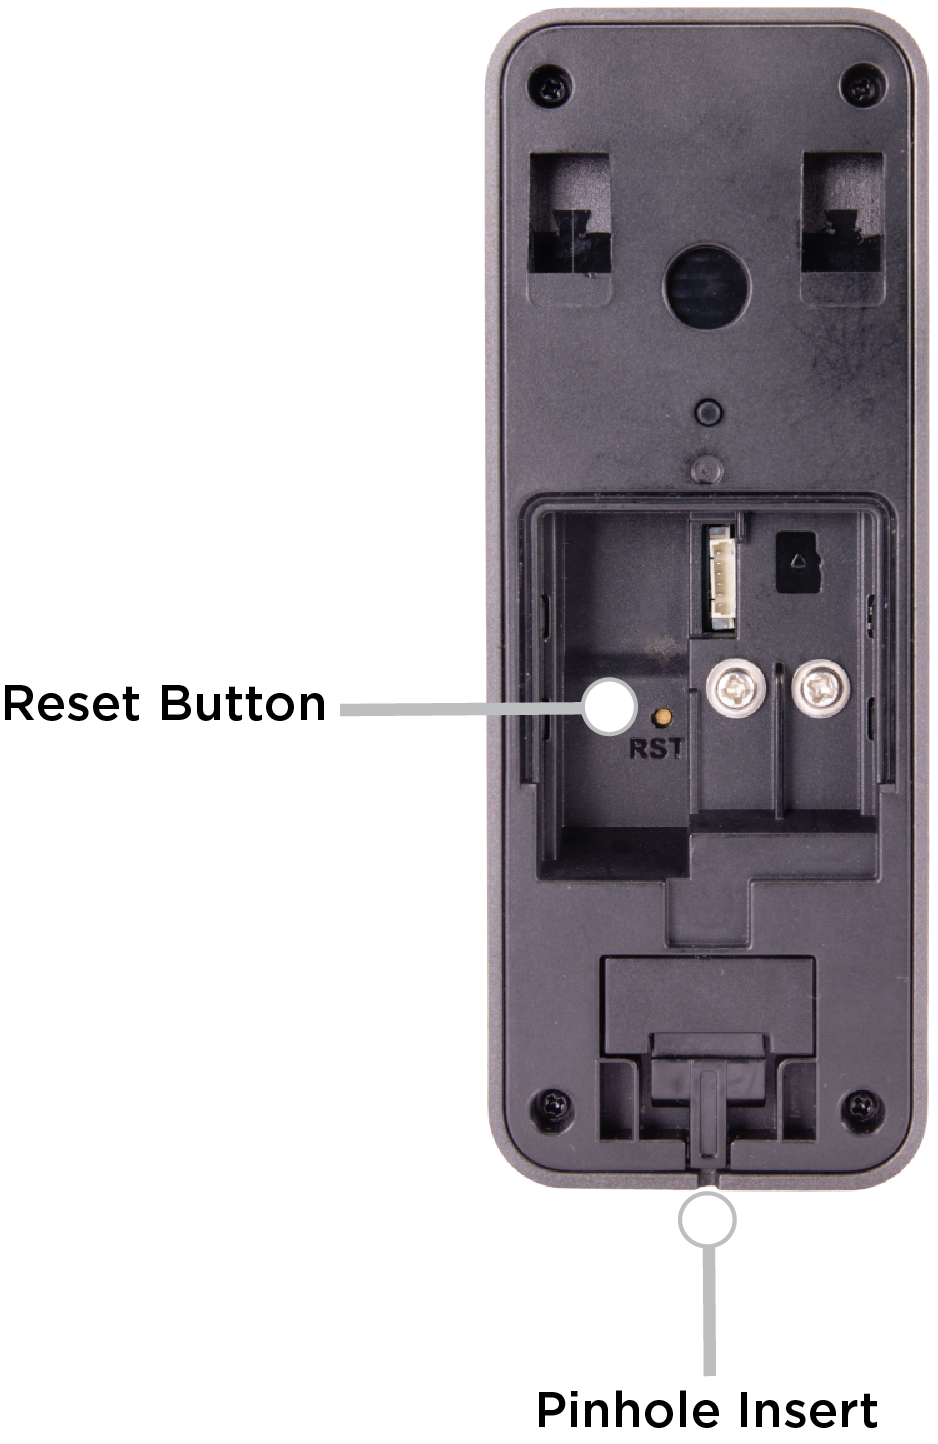
Use a SIM ejector tool or paper clip and insert the rounded end in the pinhole insert. The doorbell releases from the mounted backplate.
-
Lift and pull the doorbell to remove it from the backplate.
-
Remove the back tab from the doorbell, then locate the RST button on the back of the doorbell.
-
Use the straight end of the SIM ejector tool or paper clip and press the RST button for five seconds. This only resets the doorbell’s network settings. When the doorbell is ready to connect, the LED flashes red quickly and the doorbell plays the following message: “Please scan the Wi-Fi QR Code with the doorbell camera.”
Note: Pressing the RST button for 15 seconds resets the doorbell to its factory default settings. Ensure you only press the RST button for five seconds to reset the network settings.
-
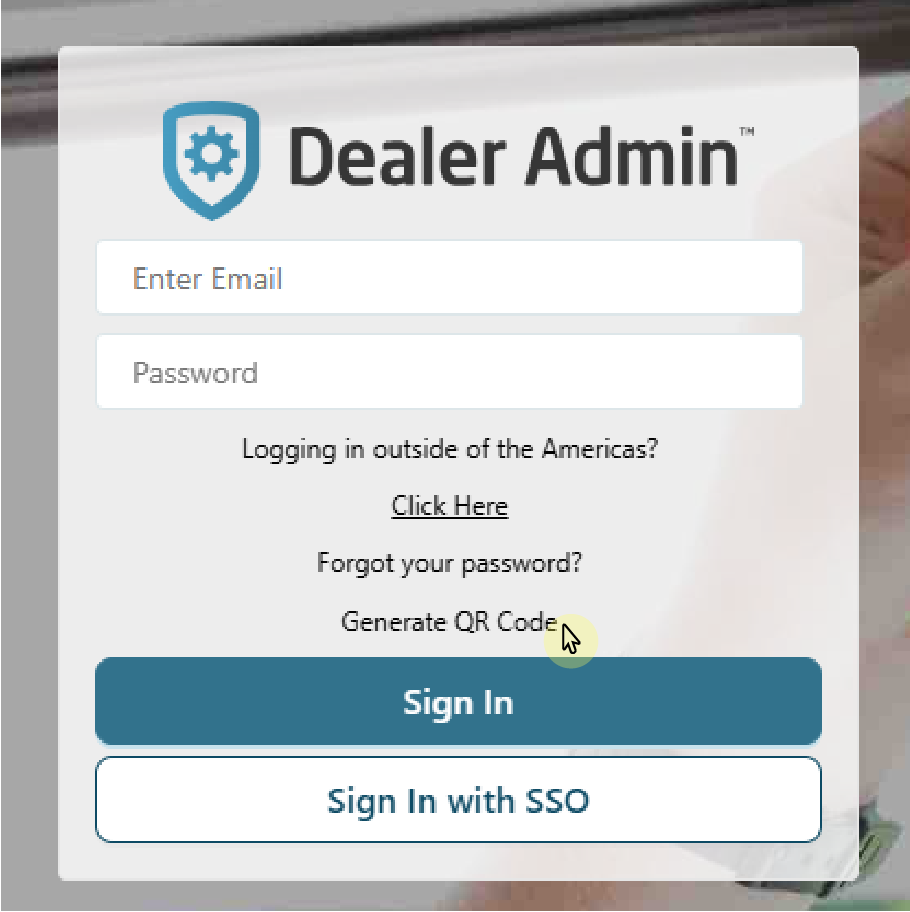
Go to the Dealer Admin log in page (dealer.securecomwireless.com), then select Generate QR Code.
-
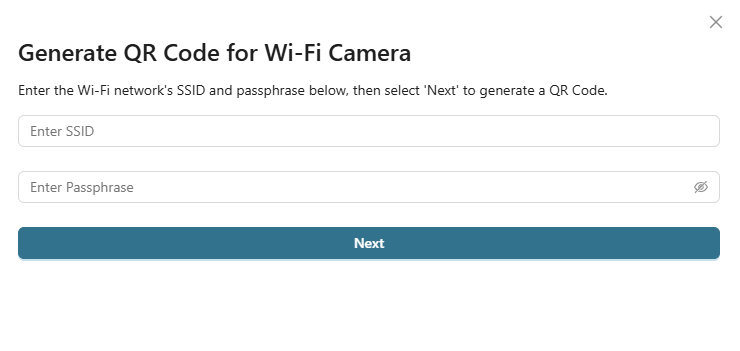
Enter the Wi-Fi network’s SSID and Passphrase, then select Next. A QR code displays.
-
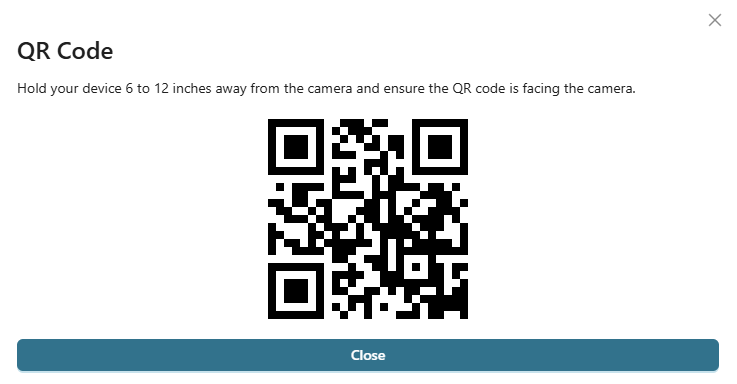
Hold the QR code 6-12 inches away from the front of the camera lens until the LED flashes blue. When the doorbell is successfully connected, it plays the following message: “Wi-Fi connected successfully.”
Note: If the doorbell does not connect to Wi-Fi, it plays the following message: “Wi-Fi pairing failed. Please try again.”
-
Once the doorbell is connected, select Close.
Update the Doorbell Firmware
After the doorbell has been activated, you can manually update the doorbell firmware if an update is available. To update the doorbell firmware, complete the following steps:
-
Log in to Dealer Admin (dealer.securecomwireless.com).
-
Go to Customers and select the System Name the doorbell is associated with.
-
At Video, go to Video Doorbells and select the doorbell that you want to update.
-
At the top of the doorbell settings page, a banner displays notifying you that a firmware update is available. Select Update Device to update the doorbell firmware.

Note: The update process can take up to 15 minutes. Leave the doorbell powered and connected to network.
Enable Monitoring Center Video Verification
-
Log in to Dealer Admin (dealer.securewireless.com).
-
Go to Customers and select the System Name that is connected to the XV Gateway.
-
In System Information, select Edit at the top of the screen.
-
Scroll down to Video. Toggle Monitoring Center Video Verification ON to enable video verification.
-
Select Save at the top of bottom of the screen.
Delete a Region
-
Log in to Dealer Admin (dealer.securecomwireless.com).
-
Go to Customers and select the System Name the doorbell is associated with.
-
At Video, go to Video Doorbells and select the doorbell that has the region you want to delete.
-
Find the region you want to delete. Select the

Delete a Doorbell
-
Log in to Dealer Admin (dealer.securecomwireless.com).
-
Go to Customers and select the System Name the doorbell is associated with.
-
At Video, go to Video Doorbells and select the doorbell you want to delete.
-
Select Delete at the top of the screen.
-
A pop up displays to confirm you want to delete the doorbell. Select Yes to delete the doorbell.
Add a Door as a Device
-
Log in to Dealer Admin (dealer.securecomwireless.com).
-
Go to Customers and select the System Name the doorbell is associated with.
-
Go to Programming, then select Device Setup.
-
Select + Add Device at the top of the screen.
-
Give the door a Device Name.
-
At Device Type, select Door.
-
Configure additional options as needed.
-
At the top of the screen, select Send All Changes.
Enable Door Control
-
Log in to Dealer Admin (dealer.securecomwireless.com).
-
Go to Customers and select the System Name the doorbell is associated with.
-
At System Information, select Edit at the top of the screen.
-
Scroll down to Virtual Keypad Access. At Door Control, ensure the checkbox is selected.
-
Select Add, then select the doorbell(s) you want to add to the system. Select Ok.

-
Select Save at the top or bottom of the screen.
Add Doorbell as a Camera to the XVGateway with AlarmVision®
You can add the doorbell as camera to the XV Gateway with AlarmVision®. When added as a doorbell, the device has full doorbell functionality and displays under Video Doorbells on Dealer Admin. When added as a camera, the device only functions as a camera and displays under Cameras on Dealer Admin. The doorbell can be added in both ways.
To add the doorbell as a camera to the XV Gateway, refer to XV Gateway with AlarmVision® Help: Add Devices to the XV Gateway.